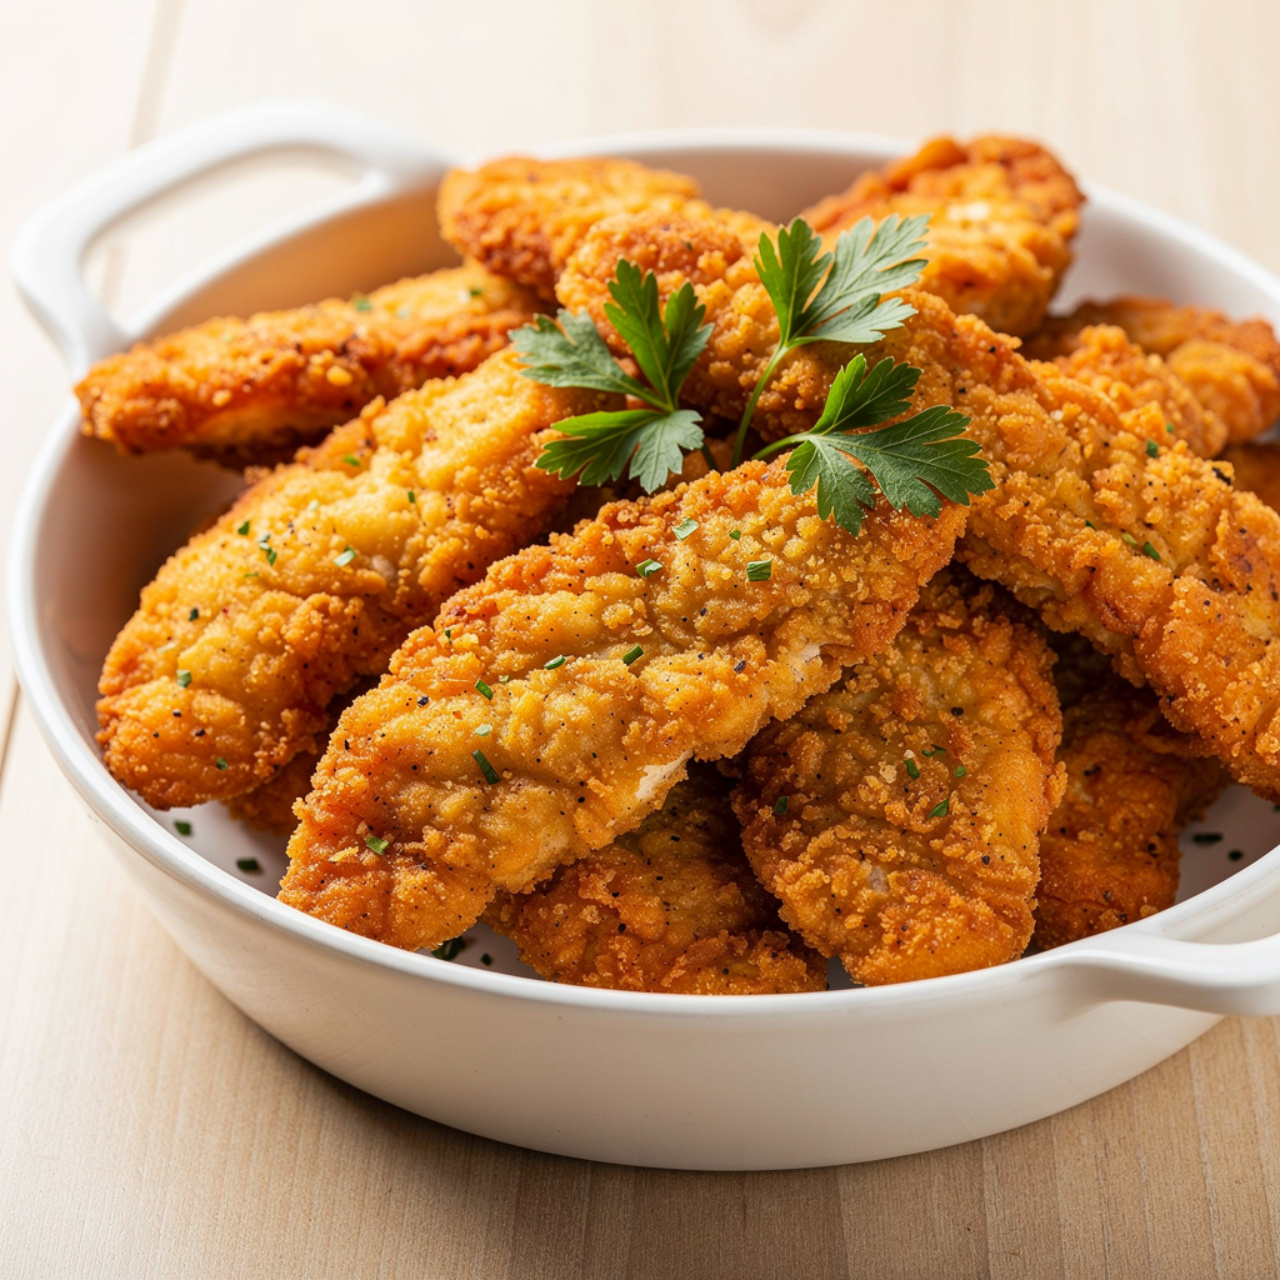
Crispy Baked Chicken Tenders (Simple, Juicy, and Family-Approved)
These crispy baked chicken tenders are golden on the outside, juicy on the inside, and ready in under 40 minutes. The easiest boneless skinless chicken tenders recipe your family will beg for on repeat.

The Only Simple Chicken Tenders Recipe You Will Ever Need
Let's be honest: chicken tenders have a reputation problem. Most homemade versions come out either rubbery and pale or so heavily breaded they taste like cardboard. These crispy baked chicken tenders fix all of that. They are golden and crunchy on the outside, juicy and flavorful all the way through, and they come together in one pan with no deep fryer required.
Whether you are pulling together a quick weeknight dinner recipe with chicken tenderloins, feeding picky kids who have opinions about everything, or just craving something nostalgic and comforting, this recipe delivers every single time.
Why This Recipe Actually Works
The secret is a combination of three things most recipes skip:
- Panko instead of regular breadcrumbs. Panko is coarser and drier, which means it crisps up dramatically better in the oven.
- A wire rack on the baking sheet. Elevating the tenders lets hot air circulate underneath, so the bottom never goes soggy.
- Dijon mustard in the egg wash. This sounds unusual but it adds a subtle depth of flavor and helps the coating stick like a dream.
These three details are the difference between tenders that look oven-baked and tenders that look like they came out of a restaurant.
Chef's Tip: Pat your chicken completely dry before breading. Moisture is the enemy of crispiness. Seriously, do not skip this step.
Tools and Ingredients That Make a Difference
For boneless skinless chicken tenders recipes like this one, the tools and pantry staples you reach for genuinely affect the outcome. A quality wire rack, real smoked paprika (not just regular paprika), and a reliable instant-read thermometer will take this from good to great.
Choosing the Right Chicken
You have a few options here, and all of them work well:
- Chicken tenderloins (also called chicken breast tenderloin or chicken tenderlions as they are sometimes spelled in grocery store labeling) are the easiest choice. They are already the right size and shape.
- Chicken breast strips cut lengthwise into 1-inch-wide pieces are a perfect substitute.
- Thin-cut chicken breasts halved horizontally also work if tenderloins are not available.
For a healthy chicken tender meal, tenderloins are naturally lean and high in protein, making this a genuinely nutritious dinner option without any sacrifice in flavor.
How to Season Them Right
The seasoning blend here is intentionally bold. Smoked paprika gives a warm, slightly smoky backbone. Garlic powder and onion powder build savory depth. Parmesan in the breadcrumb mix adds a salty, nutty richness that regular breadcrumbs simply cannot match.
Feel free to adjust the spice level to suit your family. A pinch of cayenne adds a nice kick. A little dried oregano or Italian seasoning shifts the flavor toward something more herb-forward.
What to Serve With Chicken Tenders
This is one of those recipes to make with chicken tenders that plays well with almost any side:
- Honey garlic dipping sauce (just mix honey, soy sauce, garlic, and a splash of rice vinegar)
- Roasted broccoli or green beans for a balanced plate
- Sweet potato fries or waffle fries for the full comfort food experience
- Coleslaw for something cool and creamy alongside the crunch
If you are specifically looking for sides for honey garlic chicken, a simple steamed jasmine rice or buttery corn rounds out the meal beautifully.
Ready to make the crispiest baked chicken tenders of your life? Here is everything you need:
Crispy Baked Chicken Tenders (Simple, Juicy, and Family-Approved)
These crispy baked chicken tenders are golden on the outside, juicy on the inside, and ready in under 40 minutes. The easiest boneless skinless chicken tenders recipe your family will beg for on repeat.
Ingredients
- 1 1/2 lb chicken tenderloins, patted dry
- 1 cup panko breadcrumbs
- 3/8 cup grated parmesan cheese, finely grated
- 1 tsp garlic powder
- 1 tsp smoked paprika
- 1/2 tsp onion powder
- 3/4 tsp kosher salt
- 1/4 tsp black pepper, freshly ground
- 2 large eggs, lightly beaten
- 1 tbsp Dijon mustard
- 2 tbsp olive oil or avocado oil spray, for drizzling or spraying
Instruction
Preheat your oven to 425 degrees F (220 degrees C). Line a large baking sheet with a wire rack and lightly spray the rack with oil. This allows heat to circulate under the tenders for maximum crispiness.
In a shallow bowl, whisk together the eggs and Dijon mustard until smooth. Set aside.
In a separate shallow bowl, combine the panko breadcrumbs, grated parmesan, garlic powder, smoked paprika, onion powder, salt, and black pepper. Stir well to combine.
Pat the chicken tenderloins completely dry with paper towels. This step is critical for getting a crispy coating.
Working one at a time, dip each tenderloin into the egg mixture, letting any excess drip off. Then press it firmly into the breadcrumb mixture on both sides, making sure the coating adheres fully.
Arrange the coated tenders in a single layer on the prepared wire rack. Do not overlap them.
Lightly spray or drizzle the tops of the tenders with oil.
Bake for 20 to 22 minutes, flipping once at the 12-minute mark, until the coating is deep golden brown and the internal temperature reads 165 degrees F (74 degrees C).
Remove from the oven and let rest for 3 minutes before serving. Serve with your favorite dipping sauce.
Equipment
- Large rimmed baking sheet
- Wire oven rack
- 2 shallow bowls for dredging
- Instant-read meat thermometer
- Paper towels
- Cooking spray or pastry brush
Notes
Storing and Reheating
Leftovers keep well in the fridge for up to 3 days in an airtight container. To reheat and actually preserve the crunch, skip the microwave entirely. A few minutes in a 375 degree oven or air fryer brings them right back to life.
These also freeze well. Lay them flat on a baking sheet, freeze until solid, then transfer to a zip-lock bag. Reheat from frozen at 400 degrees F for about 15 minutes.